Building Plugins
Building NativeScript plugins is a great way to learn more about how NativeScript works, to create functionality that you can share across applications, and to leverage some really powerful functionality - such as the ability to use native iOS and Android frameworks.
Let's start by looking at the basics of how to structure a NativeScript plugin, and then move on to look at how you can generate that structure using the NativeScript plugin seed.
Plugin Basics
At their basic level NativeScript plugins are simple JavaScript modules that use well established npm conventions. For example, here's what the world's simplest NativeScript plugin looks like.
nativescript-hello-world/
└── src
    ├── index.js
    └── package.json
IMPORTANT: Putting your source in a sub-folder is required for local LiveSync debugging.
Older plugins should be updated to move their source code in to a sub-folder.
And here is the simplest possible implementation of that plugin.
// index.js
module.exports = {
  helloWorld: function() {
    console.log("Hello World");
  }
}
/* package.json */
{
  "name": "nativescript-hello-world",
  "version": "1.0.0",
  "nativescript": {
    "platforms": {
      "ios": "3.0.0",
      "android": "3.0.0"
    }
  }
}
There are a few things to note in this implementation.
-
NativeScript uses the
CommonJS format
for defining JavaScript modules. In practical terms that just
means you need to know the syntax for importing and exporting
functionality (
require,export, andmodule.exports). It's pretty straightforward, and you'll see several examples throughout this guide. -
NativeScript plugins must have a "nativescript" key in their
package.jsonfile that specifies the minimum version of the iOS and Android runtimes that the plugin supports. Don't worry about this at the moment, other than to note that it's there.
TIP: Other than the
"nativescript"key, everything about your plugin'spackage.jsonfile will be identical to any other npm package. Therefore, the npm docs about thepackage.jsonfile are a great reference when tinkering with your NativeScript plugin's metadata during development.
To use the above plugin all you need to do is install it in one of your apps.
tns plugin add /path/to/nativescript-hello-world/src
TIP: The
tns plugin addcommand lets you install plugins from non-npm locations, such as GitHub repos, local folders, or .tgz archives. For details, runtns plugin add --helpfrom your command line.
With the plugin installed, you can use the CommonJS
require() method to import your plugin and use its
helloWorld() method.
var helloWorldModule = require("nativescript-hello-world");
helloWorldModule.helloWorld();
And with that you have a functional, albeit extremely basic, NativeScript plugin.
Most plugins need to do much more than log a simple string. To build a robust plugin you need some conventions for building, testing, and distributing the plugin you're building. And that's where the official NativeScript plugin seed comes in.
The NativeScript Plugin Seed
The NativeScript plugin seed is a cloneable GitHub repository that makes starting, building, and maintaining NativeScript plugins easy.
Let's look at how the plugin seed works, and in the process build a simple plugin that can retrieve an app's version number on both Android and iOS.
NOTE: Although we recommend using the NativeScript plugin seed, you do have the ability to build your NativeScript plugin from scratch. If you're interested in creating your own plugin development workflow, refer to the NativeScript plugin reference for details on exactly how NativeScript plugins are structured.
Step 1: Start Your Plugin
Because the NativeScript plugin seed is a public and open source
repository, you'll start your plugin by running
git clone. The command below clones the seed into a
new folder called "nativescript-version-number".
git clone https://github.com/NativeScript/nativescript-plugin-seed nativescript-version-number
TIP:
- The
git clonecommand takes an optional<directory>argument, and you can use it to change the folder name of any repository that you clone. The above command uses this to clone a repository named "nativescript-plugin-seed" into a folder named "nativescript-version-number".- By convention, NativeScript plugins use a naming convention of nativescript-name-of-plugin, which is why this plugin uses the name "nativescript-version-number" instead of something like "nativescript-VersionNumber" or "NativeScriptVersionNumber". Sticking to this naming convention allows developers to find your plugin easily.
You'll learn about the file structure of your plugin
momentarily, but first there's one last setup script you need to
run. After your git clone command finishes,
cd into your new plugin's src folder,
and then run the npm postclone script.
cd nativescript-version-number/src
npm run postclone
The postclone script will ask you a few questions,
such as your GitHub username, your plugin's name, and whether
you'd like to set up a new git repository for your plugin (You
probably want to, as otherwise your repo will start with the
source control history of the NativeScript plugin seed itself).
After the postclone script completes, your plugin
should have a folder structure that looks looks this.
nativescript-version-number/
├── demo
├── publish
└── src
Here are what these folders do.
-
demo: Contains a pre-built NativeScript demo app that you'll use to test your plugin in action. -
publish: Contains shell scripts that will help you publish your plugin to npm. We'll come back to this later on. src: Contains your plugin's source code.
During development, the NativeScript plugin seed allows you to
work on your plugin's source code in your
src folder, and have the plugin update live in a
demo app that lives in your demo folder. Let's look
at how to set up that workflow.
Step 2: Set Up a Development Workflow
In short, the process can be summarized with the following
steps: 1. Run the demo app (which references the plugin), e.g.
using npm run demo ios|android. 2. Update the
plugin code and see the result in the refreshed app.
Let's run your plugin in the demo app so you can see your plugin
in action. Start by opening a new terminal window or command
prompt on your development machine. Next, run either
npm run demo.ios or
npm run demo.android, to start up the demo app on
iOS or Android.
# Pick one of these commands and run it while still in the src folder.
npm run demo.ios
npm run demo.android
If all went well, you should see the demo app start up and show one of the following screens.
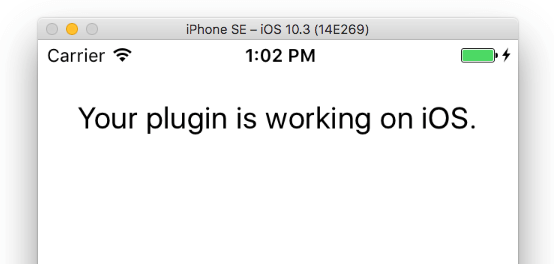
To show how the development process works, next, open your
plugin's src/version-number.common.ts file, find
the line of code that contains the "Your plugin is working"
string, and make a small change. For example you could change
the entire line of code that sets the msg variable
to the following.
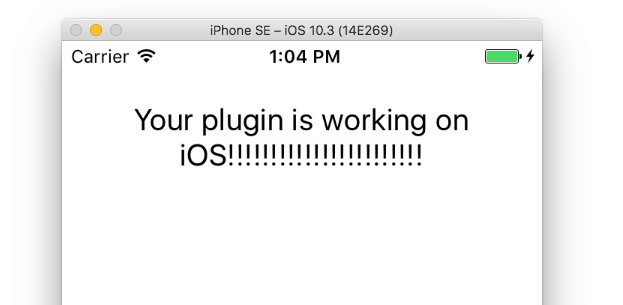
let msg = `Your plugin is working on ${app.android ? 'Android' : 'iOS'}!`;
After you save this change a few things are going to happen.
Next, your demo command (tns run) will
detect the change and automatically refresh your demo app to
show your string update.
NOTE: Wondering how this works? The demo application's
package.jsonfile is set to reference the plugin's source code in thesrcfolder directly. This link allows you to edit files insrc, and see those changes in your demo immediately.
Pretty cool, huh? With this workflow you have the ability to develop NativeScript plugins just like they're any other files in your NativeScript apps.
Now that you have a workflow in place, let's take a step back
and look at the files in src in detail, and discuss
how you can alter the plugin's default structure to meet your
needs.
Step 3: Write Your Plugin
Your plugin's src folder is where you'll work on
writing your plugin. There are a number of files in this folder,
but let's start with the .ts files as they're where
you'll spend the majority of your time.
.
├── version-number.android.ts
├── version-number.common.ts
└── version-number.ios.ts
NOTE:
- Each
.tsfile will have have a generated.jsfile with the same name, but you can safely ignore those. If you're using Visual Studio Code you can add a bit of configuration to hide generated.jsfiles in your editor.- Each
.tsfile also has a generated.d.tsfile. Don't worry about these files as the NativeScript CLI takes care of creating these files for you. The only.d.tsfile you need to worry about issrc/index.d.ts, and you'll learn about that file momentarily.
The .android.ts file is where you put the Android
implementation of your plugin; the .ios.ts file is
where you put the iOS implementation of your plugin; and the
.common.ts file is an optional file where you can
put any code you intend to share on both platforms. The shared
code in the .common.ts file must be referenced in
your platform specific .android.ts and
.ios.ts files. For example in
version-number.ios.ts you will see:
import { Common } from './version-number.common';
To get an idea of what all this looks like in action let's
implement a basic version of the version number plugin. Start by
opening your src/version-number.common.ts file
deleting all of the starting code, as you'll start with a simple
plugin that doesn't share logic across iOS or Android.
Next, open your version-number.ios.ts file and
paste in the following code.
export class VersionNumber {
  get() {
    var version = NSBundle.mainBundle.objectForInfoDictionaryKey("CFBundleShortVersionString");
    return version;
  }
}
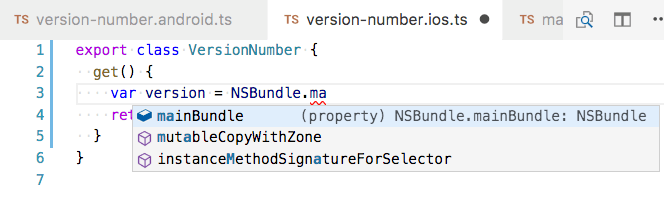
The NativeScript plugin seed automatically sets up the necessary
TypeScript configuration for working with native iOS and Android
APIs, so as you develop your plugins you'll get a little help
working with these native APIs in TypeScript-friendly editors
like Visual Studio Code. For example, if you start to type out
NSBundle, Visual Studio Code helps you find the
native iOS APIs that are available.
TIP: If you're new to working with native APIs in NativeScript, check out our documentation on accessing native APIs in JavaScript and TypeScript. You might also want to dive into a few existing plugins' source code just to see how they work. Almost every plugin on the NativeScript marketplace is open source.
There are still a few more changes you need to make before your
plugin is ready to test. Next, open your
src/version-number.android.ts file and paste in the
following code:
import { Application } from "@nativescript/core";

export class VersionNumber {
  get() {
    var PackageManager = android.content.pm.PackageManager;
    var pkg = application.android.context.getPackageManager().getPackageInfo(application.android.context.getPackageName(),
      PackageManager.GET_META_DATA);
    return pkg.versionName;
  }
}
With this you have a functional plugin implementation for both iOS and Android, but you still have one minor configuration change to make.
Open your src/index.d.ts file and paste in the
following code.
export declare class VersionNumber {
  get(): string;
}
The index.d.ts file serves two purposes: first, it
serves as a contract for any application that uses this plugin
(you'll see this in a minute when you switch your demo to use
this new API). Second, the .d.ts file is what
enables intellisense or code completion features in
TypeScript-friendly editors.
The NativeScript CLI does not generate your
index.d.ts file, but in most situations you can
copy the contents of your .android.d.ts file or
your .ios.d.ts file into your
index.d.ts file. (The only time you wouldn't want
to do that is if your plugin had Android- or iOS-specific APIs
that you wanted to expose.)
TIP For more detailed information on writing declaration files refer to TypeScript's documentation on the topic.
With that, your plugin is completely functional and can retrieve
your app's version number on both iOS and Android. To test this
out, head back to your demo app, open your
demo/app/main-view-model.ts file, find the line of
code that sets this.message, and change it to use
the following line of code.
this.message = this.versionNumber.get();
If you still have npm run demo.ios|android running,
you should see your demo app update to show your app's version
number on the screen. (If not, refer back to step 2 and
refamiliarize yourself with the plugin development workflow.)

Now that you have a complete plugin, you're ready to use your plugin in your apps, and to do that you'll need to publish it.
Step 4: Publish Your Plugin
WARNING The publish script of the NativeScript plugin seed requires that you use a bash-enabled terminal or command prompt. If you're on Windows, you can install GIT SCM and use Git Bash to run these scripts.
Your NativeScript plugin is currently a collection of TypeScript
files in a src folder. The NativeScript plugin seed
provides a series of scripts that can build those files into a
distributable npm package.
There are two different scripts that you can run depending on whether you just want to build a plugin package, or whether you want to additionally register that plugin on the npm registry.
Both scripts are in the publish folder in your
plugin's root folder, so start by using the
cd command to navigate into that folder:
cd ../publish
Next, if you just want to create a package, execute the
pack.sh script using the following command:
./pack.sh
The pack command will build your plugin, and place the built
archive in your plugin's publish/package folder,
for example
publish/package/nativescript-version-number-1.0.0.tgz. You can then take that plugin package and install it in other
NativeScript apps using the tns plugin add command:
tns plugin add nativescript-version-number-1.0.0.tgz
If you want to publish your new plugin in npm, there are a few
additional steps you need to take. First, open your plugin's
src/package.json file.
Your plugin's package.json contains the metadata
npm will display about your plugin, so you'll want to make sure
that the information listed in this file is correct.
Specifically, make sure the "description" and
"author" fields have appropriate values, and also
that your "version" contains the version number you
want npm to use. (You'll need to increment that
"version" with each subsequent release of your
plugin.)
Next, open the README.md file in the root of your
plugin. The NativeScript plugin seed generates a basic README
with a simple outline, but you'll want to replace this file with
more complete documentation before you publish your plugin for
the world to see. If you're not sure what to put here take a
look at what other plugins do. The
version number plugin
has a dead-simple README you can refer to, and plugins like the
fingerprint auth plugin
or
MapBox plugin
provide more complex README patterns you may want to copy from.
Once you're all set with your
package.json configuration, as well as your
README.md documentation, return to the
publish folder or your plugin and run the
publish.sh script.
./publish.sh
The publish command runs through the same build process as the pack command, but after the build completes the command will additionally push your plugin to the npm registry.
NOTE: For the publish command to work you need to be logged into the
npmCLI usingnpm adduserornpm login. For details on how to use these commands see the npm documentation on the topic.
And that's it! You have now built a simple plugin, set up a robust development workflow, and got everything ready to share your plugin with the world.
And these are just the basics. The plugin seed supports more advanced workflows for your plugin development. You may be interested in trying out: