RadListView Getting Started
This article will guide you through the process of adding a
RadListView in your application, binding it to a data-source and
visualizing the items by using an item template of your choice.
For more information on how each separate feature of
RadListView
is used, please refer to the dedicated articles which are using
the same scenario and extend it further. The code snippets from
this section are available as
a standalone demo application.
Installation
Run the following command to add the plugin to your application:
tns plugin add nativescript-ui-listview
Adding a RadListView to Your Page
Then, in order to add a
RadListView
instance in a page of your application, you need to define the
following XML namespace:
xmlns:lv="nativescript-ui-listview".
After that, you can use the following XML construct to put
RadListView
in your page:
Example 1: Adding RadListView to your Page
<navigation:ExamplePage xmlns:navigation="navigation/example-page" loaded="onPageLoaded" xmlns:lv="nativescript-ui-listview" xmlns="http://www.nativescript.org/tns.xsd">
    <lv:RadListView items="{{ dataItems }}" >
        <lv:RadListView.itemTemplate>
            <StackLayout orientation="vertical">
                <Label fontSize="20" text="{{ itemName }}"/>
                <Label fontSize="14" text="{{ itemDescription }}"/>
            </StackLayout>
        </lv:RadListView.itemTemplate>
    </lv:RadListView>
</navigation:ExamplePage>
This will initialize a new
RadListView
instance with a Linear Layout and put it as a direct child of
your page.
You can read more about layouts here: Item layouts
Now we want to prepare a list of items as a source and pass them
to the RadListView. Let's create a view-model which will become
the binding context of our page and will expose a collection of
objects that we will use to populate the control. Create a new
file called view-model in your application and
paste the following code:
Example 2: Creating the models used to feed RadListView with data
import { ObservableArray } from "tns-core-modules/data/observable-array";
import { Observable } from "tns-core-modules/data/observable";

export class ViewModel extends Observable {

    constructor() {
        super();
        this.dataItems = new ObservableArray<DataItem>();

        for (let i = 0; i < 10; i++) {
            this.dataItems.push(new DataItem(i, "Item " + i, "This is item description."));
        }
    }

    get dataItems(): ObservableArray<DataItem> {
        return this.get("_dataItems");
    }

    set dataItems(value: ObservableArray<DataItem>) {
        this.set("_dataItems", value);
    }
}

export class DataItem {
    public id: number;
    public itemName;
    public itemDescription;

    constructor(id: number, name: string, description: string) {
        this.id = id;
        this.itemName = name;
        this.itemDescription = description;
    }
}
Now, to provide a binding context for the page, we can use the
pageLoaded event and assign an instance of the
view-model to the bindingContext property of the
page as follows:
Example 3: Assigning the binding context to the RadListView page
import { ViewModel } from "./getting-started-model";
export function onPageLoaded(args) {
    const page = args.object;
    page.bindingContext = new ViewModel();
}
Note that we have also set the
listViewLayoutproperty to an instance of theListViewLinearLayoutclass. This is needed for theRadListViewto work.
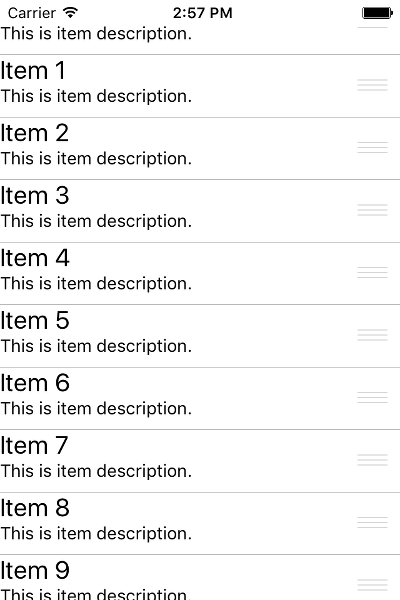
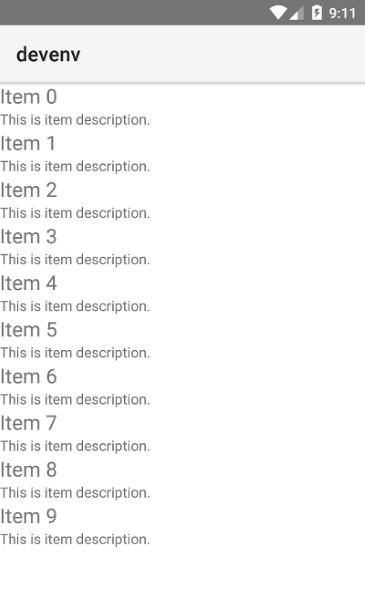
Building and running the application will produce the following result:
Figure 1: Getting started with RadListView for NativeScript:


References
Want to see this scenario in action? Check our SDK examples repo on GitHub. You will find this and many other practical examples with NativeScript UI.
Related articles you might find useful: