Basics of the NativeScript Command-Line Interface
In this article, you’re going to learn the basics of the NativeScript command-line interface, including how to create new apps, how to get those apps running on devices, and how to set up a development workflow that lets you iterate fast.
Creating Applications
In NativeScript you create and run apps using the NativeScript
CLI. After
installation, the
NativeScript CLI is available on your terminal or command prompt
as a tns command—which is short for Telerik
NativeScript.
In this section, you’ll familiarize yourself with the
NativeScript CLI, and use the CLI’s create command
to start your first NativeScript app.
Exercise: Use the tns create command
Open your terminal or command prompt and run the following command to create a new NativeScript application.
tns create HelloWorld --template @nativescript/template-blank-ng
Here you’re passing two things to the
create command: HelloWorld which
determines the name of the app you’re creating, and the
--template option, which tells the NativeScript CLI
to scaffold an app using a predefined template named
“@nativescript/template-blank-ng”.
TIP: You can use the
tns createcommand to scaffold apps at a variety of different starting points. To try other templates, runtns createwithout the--templateoption; the NativeScript CLI will walk you through selecting a template using interactive prompts.
The create command will take a minute to complete,
as the NativeScript CLI needs to download a few dependencies
while setting up your new app.
When the command finishes, use the cd command
(change directory) to navigate into your new app’s folder.
cd HelloWorld
Now that you’ve created an app let’s look at how to get your new app up and running on a device.
TIP: You can use the
tns helpcommand to view the NativeScript CLI’s help documentation in your web browser.
Running Applications
Once your NativeScript mobile project is created, you can start the application in two different ways:
-
Using a preview build via the
previewcommand. This option allows you to test NativeScript with a quick setup. See the quick setup section for details). -
Using a local build via the
runcommand. This option allows you to experience the full developer experience (building and deploying on local emulators and devices). See the full setup section for details.
Quick Setup Using PREVIEW
NOTE: To complete this section you must finish the NativeScript CLI quick setup.
Now that you have an app scaffolded on your local computer, you’re ready to run your application on a device.
Exercise: Use the tns preview command
In NativeScript you use the CLI’s
tns preview command to link the app you’re
developing locally to the NativeScript Playground app for your
iOS or Android device. Let’s look at how it works.
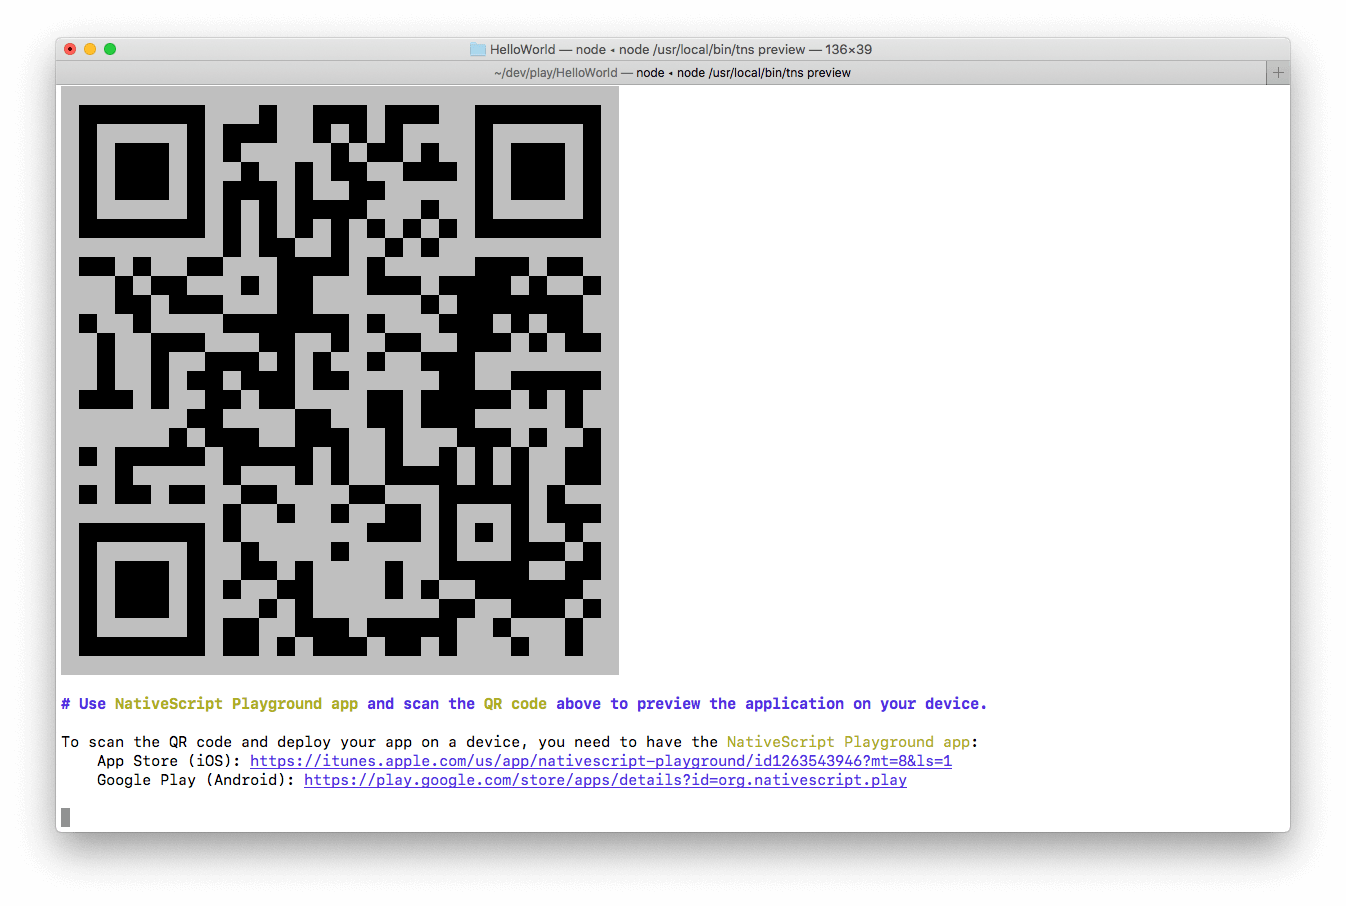
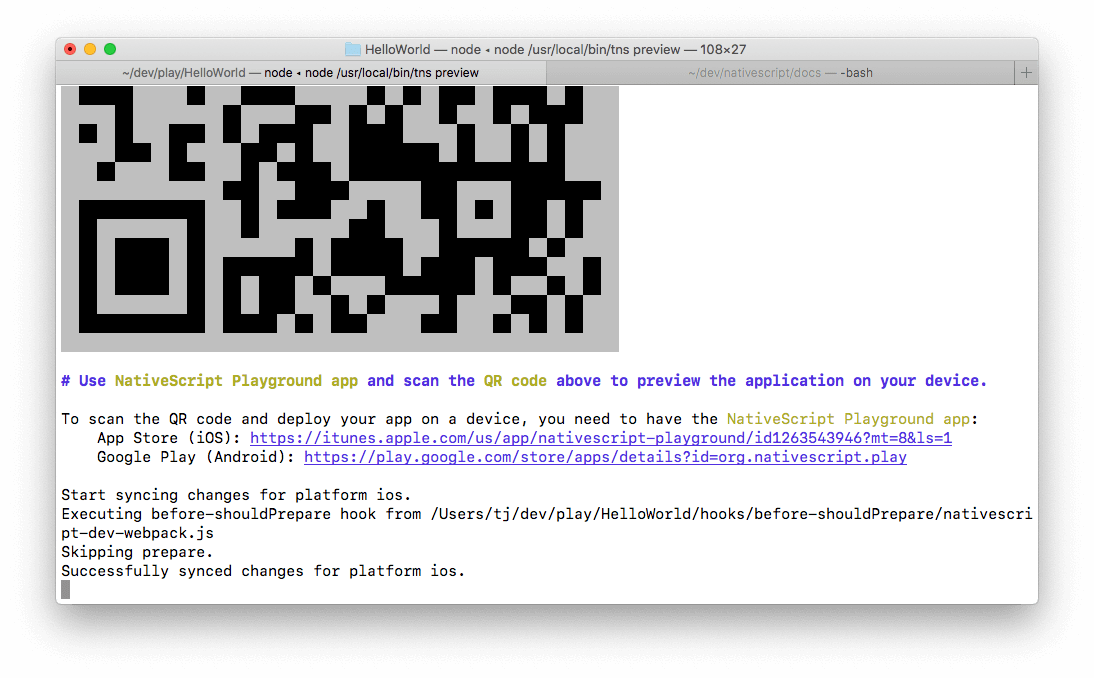
Execute the following command in your terminal or command prompt.
tns preview
You’ll see a QR code in your terminal that looks a little something like this.
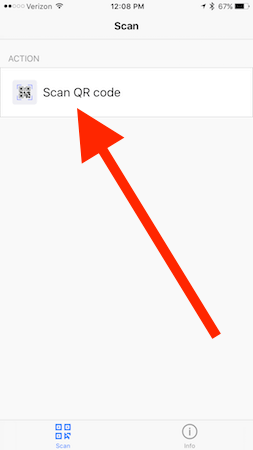
Next, open the NativeScript Playground app on your iOS or Android device.
NOTE: If you don’t already have the NativeScript Playground app installed on your device, go ahead and download it by searching for “NativeScript Playground” in the iOS App Store or Google Play.
In the Playground app, tap the Scan QR code option, and scan the QR code that appears in your terminal or commands prompt.
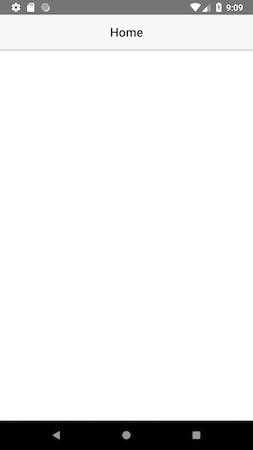
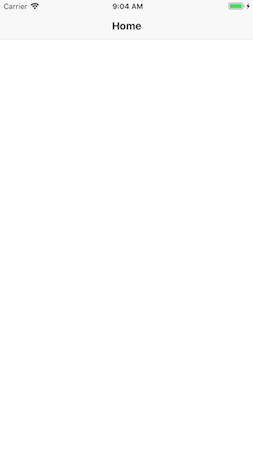
After scanning, you should see your app on your device.
Now that you have the app on your device, you might notice that
the tns preview command in your terminal or command
prompt never finished. That is, you cannot type in your
terminal.
This happens because the tns preview command is now
watching your project for changes. When the
tns preview command detects a code change, the
command automatically refreshes, or livesyncs, your app
so you can see those changes immediately. Let’s make some
updates to your code so you can see this in action.
Exercise: Try Livesync
Open your new project in your favorite text editor or IDE.
TIP: You can use any editor to develop NativeScript apps, but we recommend Visual Studio Code. Feel free to skip ahead to this chapter’s appendix for more information.
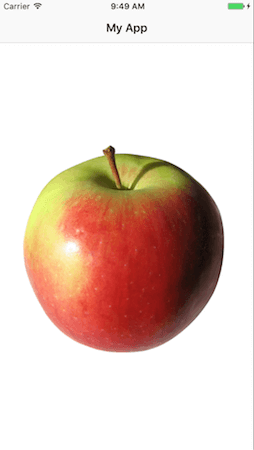
Let’s add a simple image to your app so you can see how livesync
works. Open your app’s
app/home/home.component.ts file, and replace its
contents with the following code:
import { Component } from "@angular/core";

@Component({
  selector: "my-app",
  template: `
    <ActionBar title="My App" class="action-bar"></ActionBar>
    <Image src="https://user-images.githubusercontent.com/544280/42960643-66d498ac-8b5a-11e8-8946-7224eefea6a5.jpg"></Image>
  `
})
export class HomeComponent {
  // Your TypeScript logic goes here
}
NOTE: Don’t worry about the specifics of how this code works yet. We’ll cover the details momentarily—for now get comfortable with how livesync works.
Your emulator should refresh and display the new image.
Next, open your app’s app/app.css file and paste
the following code at the bottom of the file. Again don’t worry
about the details of what this code is doing right now.
@keyframes spin {
    from { transform: rotate(0); }
    to { transform: rotate(360); }
}
Image {
    animation-name: spin;
    animation-duration: 3s;
    animation-iteration-count: infinite;
    animation-timing-function: linear;
}
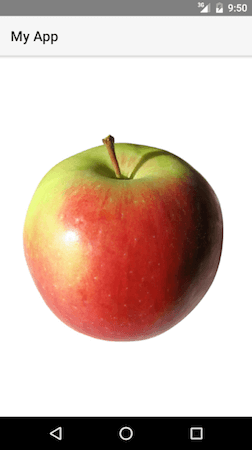
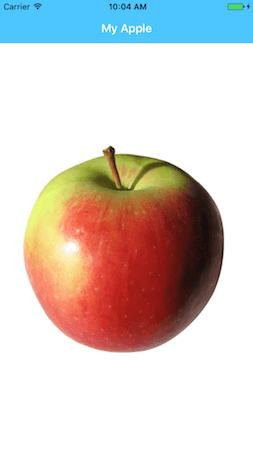
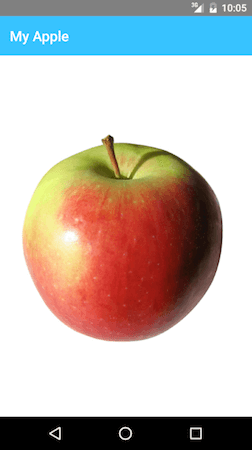
When your emulator refreshes, you should see a crazy spinning apple!
Let’s make one final change.
Find the first line of your app’s app/app.css file,
which imports a core.light.css file. This import
tells NativeScript to use a “light” color scheme. Let’s change
to the “sky” color scheme by replacing the existing line of code
with the one shown below.
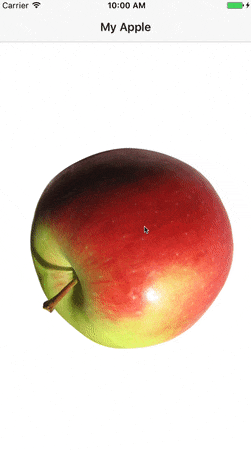
@import '~nativescript-theme-core/css/sky.css';
The emulator should refresh, and you should see a nice blue ActionBar color:
Challenge: Pick a different color scheme
Are you looking for a little more fun? NativeScript has several color schemes available for styling your iOS and Android apps. Pick a different stylesheet from the full list and try it out in your app. Which one looks best?
Overall, the NativeScript CLI’s livesync process makes native iOS and Android development feel a lot like web development. You can change your CSS, markup, and JavaScript code, and see those changes reflected on the fly—all in a completely native mobile app.
Full Setup Using RUN
NOTE: To complete this section you must finish the NativeScript CLI full setup.
The NativeScript CLI quick setup allows you to develop your apps locally, and test your apps on physical iOS or Android devices through the NativeScript Playground app. Although this workflow is great for getting started, it does have limitations.
After you complete the NativeScript CLI full setup, you can compile iOS and Android applications locally and push those apps directly to iOS simulators, Android Virtual Devices, or physical devices. Plus, you get the same fast development workflow you used with the quick setup.
Exercise: Use the tns run command
In NativeScript, you use the CLI’s tns run command
to build your apps locally and install them on iOS or Android
devices. Let’s start with Android.
Execute the following command in your terminal to run your app on an Android emulator.
tns run android
NOTE:
- If you get an error at this point you likely haven’t completed the NativeScript CLI full setup instructions. If you’ve gone through the instructions and are still stuck, try asking for help on Stack Overflow.
- You must have at least one AVD (Android Virtual Device) configured on your development machine for this command to run your app up on an Android emulator. If you don’t have one installed currently go ahead and set one up now.
The run command will take a few seconds to
complete, as the NativeScript CLI will be building and deploying
a native Android application. When the command finishes the
native emulator will open, and you will again see your app—only
this time, the app is running on a local emulator.
If you’re on macOS and would prefer to develop for iOS first,
type Ctrl + C in your terminal to end
the previous tns run android command and then
execute the following command instead.
tns run ios
NOTE: NativeScript uses Xcode under the hood to build and run iOS apps, and Xcode is only available on macOS; therefore, you can only run iOS apps on macOS.
The run command will again take a few seconds, as
the NativeScript CLI will be building and deploying a native iOS
application. When the command finishes the native simulator will
open, and you will see your app:
Now that you have a full setup in place for developing your apps let’s look at a few additional things you can do.
Next steps
Now that you have a preview workflow set up check out our
Build a Full App tutorials in NativeScript
Playground. If you prefer working in a CLI environment, you can
download your tutorial project from Playground and complete the
tutorial locally using the tns preview command.
Debugging Applications
You now know how to create and run NativeScript apps. Your next step is learning how to debug your apps when things go wrong. Let’s look at how debugging works in NativeScript.
There are two main paths you can take when you want to debug a NativeScript application:
-
Chrome The default way of debugging a NativeScript application is by using the integration with Chrome. You can find more information on the actual steps here.
-
Visual Studio Code One of the preferred ways of debugging a NativeScript application is with the NativeScript extension for Visual Studio Code.
You’ll want to check out the Chrome Dev Tools and the Visual Studio debugger as you need to step through your JavaScript code or TypeScript code, but for the moment let’s look at how to do some simple logging in your apps.
Exercise: Console logging in NativeScript
One of the most natural things you can do to debug apps in any
environment is writing to the system’s log. In NativeScript
logging works a lot as it does on the web, as most of the same
console APIs that work on the web also work in
NativeScript.
To see this action open your app’s
app/home/home.component.ts file and replace its
contents with the code below.
import { Component } from "@angular/core";
@Component({
selector: "my-app",
template: `
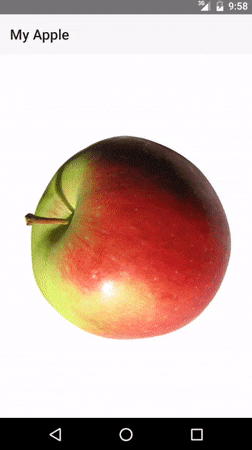
<ActionBar title="My Apple" class="action-bar"></ActionBar>
<Image src="https://user-images.githubusercontent.com/544280/42960643-66d498ac-8b5a-11e8-8946-7224eefea6a5.jpg"></Image>
`
})
export class HomeComponent {
constructor() {
console.log("Hello World");
}
}
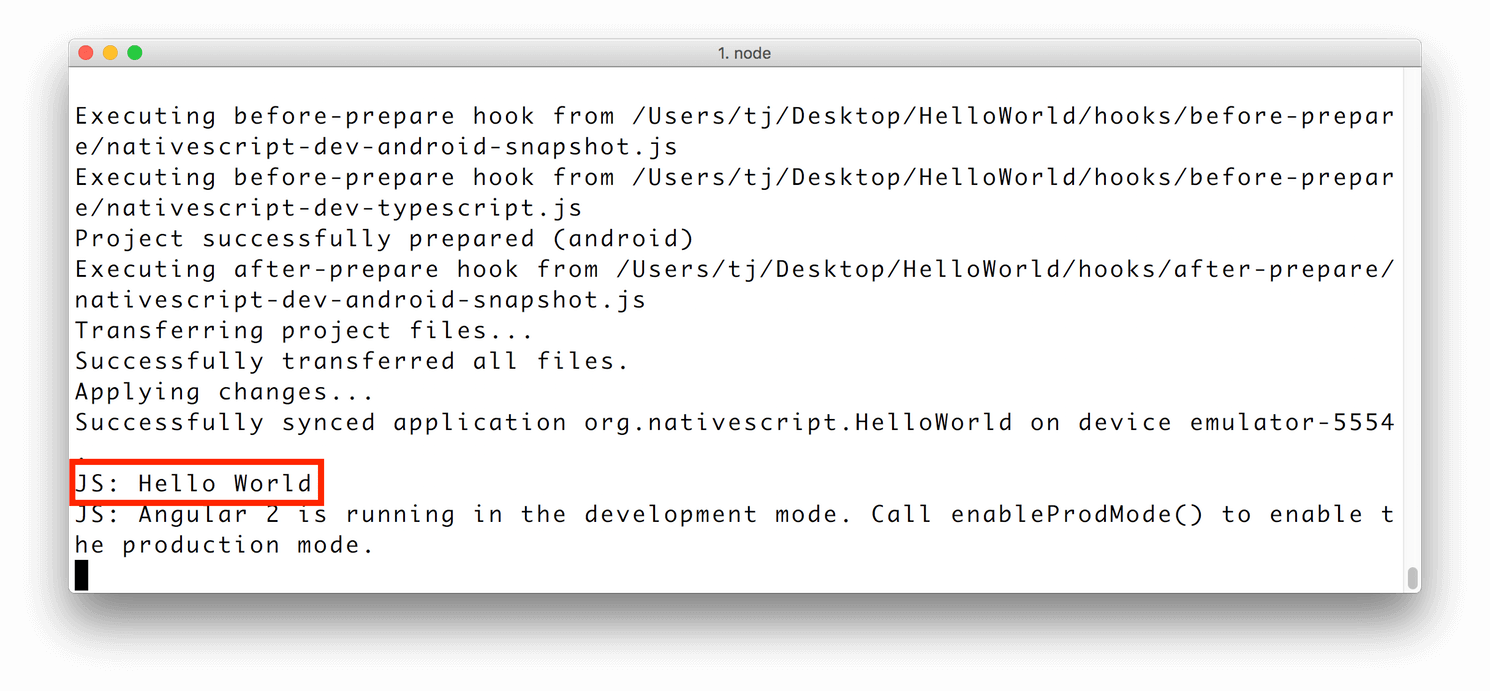
After the NativeScript CLI refreshes your app, head back to your terminal or command prompt. You should see a “Hello World” message at the bottom that looks like something like this.
The console.log() function is great for outputting
primitive values such as strings, numbers, and booleans, but it
doesn’t work so well for objects. For those situations you’ll
want to use another of the console object’s methods
intended for complex object output: console.dir().
To see this in action replace the contents of your
app/home/home.component.ts file with the code
below, which uses console.log() to log a simple
object.
import { Component } from "@angular/core";

@Component({
  selector: "my-app",
  template: `
    <ActionBar title="My Apple" class="action-bar"></ActionBar>
    <Image src="https://user-images.githubusercontent.com/544280/42960643-66d498ac-8b5a-11e8-8946-7224eefea6a5.jpg"></Image>
  `
})
export class HomeComponent {
  constructor() {
    console.log({
      type: "Apple",
      color: "Red"
    });
  }
}
If you look at your console, you’ll see the following not-very-helpful output.
JS: [object Object]
Go ahead and replace your code’s
console.log reference with
console.dir. After the NativeScript CLI refreshes
your app, you should see the full output of the object in your
terminal or command prompt.
JS: === dump(): dumping members ===
JS: {
JS:     "type": "Apple",
JS:     "color": "Red"
JS: }
JS: === dump(): dumping function and properties names ===
JS: === dump(): finished ===
The console.log() and
console.dir() functions are two of the many tools
available when debugging your NativeScript applications. You
might want to try out
step debugging
as you move into more advanced development, but for now, let’s
shift our attention to how to deal with errors in NativeScript
apps.
Exercise: Error handling in NativeScript
Errors happen, and when they do, it’s important to know how to handle them. Let’s mess up a few things in your new app.
Find the line of code that declares an
<ActionBar> (line 6 of your
app/home/home.component.ts file). Remove that
line’s final > character so that the line looks
like this.
<ActionBar title="My Apple" class="action-bar"></ActionBar
This is invalid markup, and as you might expect NativeScript is unable to render your user interface. What NativeScript does do, however, is log any relevant errors and stack traces to your console. If you return to your terminal and scroll up just a bit, you’ll see the following error logged that indicates precisely where the problem is.
JS: ERROR Error: Uncaught (in promise): Error: Template parse errors:
JS: Unexpected character "<" ("
JS:     <ActionBar title="My Apple" class="action-bar"></ActionBar
JS:     [ERROR ->]<Image src="https://user-images.githubusercontent.com/544280/42960643-66d498ac-8b5a-11e8-8946-7224eef"): ng:///HomeModule/HomeComponent.html@2:4
Let’s fix the error now by adding the > back to
line 6 in your home.component.ts file.
<ActionBar title="My Apple" class="action-bar"></ActionBar>
The NativeScript CLI continues to watch the files in your application, even after errors. As such, after you correct this problem, the CLI updates your app to its previous state.
Next steps
Now that you have a full NativeScript CLI setup in place, and you know how to create, run, and debug NativeScript apps, you’re now ready to start building on your own. You might find the following resources helpful as you start developing.
-
Code Samples
- The NativeScript team provides a collection of high-quality code samples you can add to your applications. Perusing the code samples is a great way to get familiar with what NativeScript can do, as well as find the code you can use on your next app.
-
NativeScripting
- The third-party NativeScripting site has many video courses to teach you everything you need to know about NativeScript, including a collection of free courses to help you get started.
Choosing An Editor
You can develop NativeScript apps in any text editor or IDE you wish. Therefore, if you’re deeply committed to an editor, by all means, continue to use your editor of choice as you build applications with NativeScript.
However, if you’re not committed to an editor, or if you’re looking to try something new, the NativeScript team recommends using Microsoft’s Visual Studio Code to develop your NativeScript applications. Here’s why.
- Visual Studio Code has excellent support for TypeScript, which you may wish to use as an alternative to JavaScript for your NativeScript development.
- Visual Studio Code gives you the ability to debug JavaScript and TypeScript code directly in your editor. The NativeScript team maintains an official NativeScript Visual Studio Code extension that enables step debugging for NativeScript apps.
- Visual Studio Code is a fast, modern editor that Microsoft updates frequently.
- Visual Studio Code is available for Windows, macOS, and Linux.
- Microsoft backs Visual Studio Code; therefore, you can feel confident that the editor will continue to be supported in the future.
If you do choose to try Visual Studio Code, let’s look at one tip you might find useful as you develop NativeScript apps.
Note: If you’re a WebStorm user, check out this popular community-written plugin that adds many NativeScript-related features.
Tip & Tricks
- The
codecommand
After you install Visual Studio Code, you can open projects
using the editor’s File → Open menu
option, but there’s an alternative option that works far better
for command-line-based projects like NativeScript: the
code command.
The code command runs in your command-line or
terminal, and it works just like the tns command
does for NativeScript apps. Visual Studio Code installs the
code command by default on Windows on Linux, but on
macOS, there’s
one manual step
you must perform.
Once set up, you can type code . in your terminal
to open the files in your current folder for editing. For
example, you could use the following sequence of command to
create a new NativeScript app and open it for editing.
tns create MyNewApp
cd MyNewApp
code .